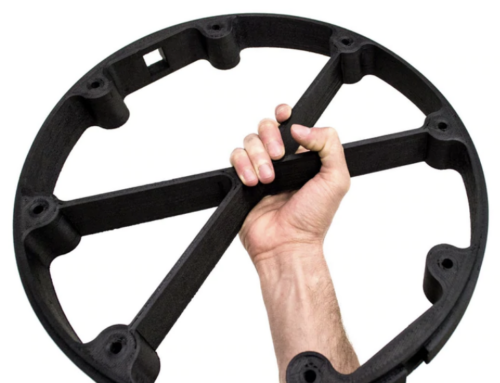
Once you’ve looked at the detail & capability of a liquid resin 3d printer, you’re bound to be impressed by the quality of parts.
Modern resins not only look good, the new resins offer mechanical properties that match conventional thermoplastics.
LCD Resin 3d printers are not only affordable, but they are fast. And they are getting bigger.
But the burning question in the minds of first time users is, how easy & safe is it to 3d print with liquid resin?
We were the very first company in New Zealand to introduce LCD Resin 3d printers over 7 years ago and we’ve learnt a thing or 2 about resin 3d printers in this time, particularly the more common LCD Resin 3d printers you see cheaply available today.
And we’d like to share some of this experience with you.
One of the main issues we found was that every manufacturer has made resin 3d printers, & even curers, but no one has invested in creating a good workflow or teaching the community the best workflow to 3d print resins safely & easily.
Its easy to get lost on forums & read every user’s own method, only to come out more confused around the fundamentals of exactly why we do, what we do.
The reality is that you just need a proper process, & a little discipline.
You’ll find buying the correct supporting post print equipment along with a resin 3d printer to be an invaluable investment.
There are lots of monomers & initiators inside 3d printing resin.
They all have some smell, even the low odour resins do. They are sticky. They can go everywhere if you let them.
Lets go through these steps on how to post-process liquid resin:
1) First we wash off the resin that is on the 3d print that has finished.
And the best way to do this is with one of our recommended Ultrasonic Cleaners.
Ultrasonic cleaners are nothing new, they’ve been used in industrial degreasing for years.
Pour some resin cleaning liquid into the ultrasonic cleaner.
Wear your gloves, pickup the build plate, put the 3d print directly into the ultrasonic cleaner.
Set the timer to just 3 mins – thats it, your parts will be rid of resin.
If the part was so large that it didn’t immerse into the cleaning liquid all at once, you can rotate the part & give it another 3 mins.
2) Take the part out of the ultrasonic cleaner, & dry it using an air gun, compressed air, a hair dryer, or whatever way you want to.
Remove all supports. If you have drain holes on them, patch them with our curing putty.
If there are support surfaces or edge you want to sand off, go ahead & do that now. Do not drill holes or try to add features or tap threads yet.
Once the part looks like you expect it to, we cure it.
3) Put the part inside one of our affordable curing units. We recommend a heated curer over a standard one any day.
But yes, if your parts are very large & don’t fit a heated curer, then at least the standard curing unit is fine.
For standard curers, & standard rmodel resins, set the curer timer to 10 mins & let it finish its cure cycle.
Then rotate the part (flip the bottom side that was on the plate & turn it to the top).
Cure for another 10 mins.
Congrats, you’ve got a factory quality 3d printed part in your hand.
FAQs
- Do we need to wash parts with IPA (Isopropyl Alcohol) or other alcohol based cleaners?
While IPA is common, we don’t recommend using it as your preferred washer. IPA is highly flammable, & inhaling it isnt doing you any favours.
IPA is not the kind of Friday 4pm office drinks you were expecting.
You are better off washing parts with resin cleaning liquids that don’t have an explosion risk, or vapourise as easily into your lungs. - Why not wash parts in a bucket? Why use an ultrasonic cleaner?
Ultrasonic cleaners sends out a very high frequency sound waves to shake loose substrate off a part surface, including its internal cavities, wherverver the resin cleaning liquid reaches. This means you dont have to touch anything, let the cleaner & the liquid, do its job, in less than 5 mins you’re done.
Would you really want to mess around in a bucket, with resin liquid splashing around, & deal with manually cleaning a surface?
Ultrasonic cleaners are cheap. They come in 2 main variants. Ours are the 40KHz version, which is really important because the 25KHz version will cause vibrations on the part which you dont want. - Why use resin cleaning liquids? Every facebook post & youtube video expert tells me to use IPA. Why not use IPA?
All resins are cleaned up really well with IPA. It has many advantages, & we recommend having IPA on you at all times when dealing with 3d printing resins. However, IPA isn’t the best choice when it comes to your health & fire safety. Do you really want to deal with explosive vapourising liquids?
WHen you wash up, particularly by hand, youi’re going to be exposing yourself to a lot of IPA fumes.
If you put IPA in an ultrasonic cleaner, the act of vibrating it is also going to start vapourising it. Of course, the batch of IPA isnt open, but still, it is going to continue being in the air one way or another. Also, ultrasonic cleaners are electronic devices. Should anything go wrong in them, a short occurs, or anything causes a fire, you’ve got yourself an explosion as bad as a gas cylinder going off. Though it is very very rare, do you really want to take this risk?
The 405nm LCD Resins we use, dont need IPA to & can be cleaned perfectly with resin cleaning liquids.
These liquids land up cheaper than IPA because they dont evaporate, & can be reused several times. - How do you dispose the cleaning liquid?
First, reuse. After you notice it is no longer dissolving the resin, you can drain the ultrasonic’s liquid into a tall bottle. Leave the cleaner inside for a few hours & you will see all the resin pigments start to settle. You can now pour the top part of the liquid & reuse it again.
You can do this many more times than you realise.
After this is done & the liquid truly


